I have had a bit of a spree making Christmas fairies, elves and angels, inspired by my favourite book Forest Fairy Crafts. You can find them at http://www.forestfairycrafts.com/. Each fairy/elf/angel is different and they are so much fun to make.
Once I had made a bunch of elves, I thought they needed some accessories...
A Santa sack. These are simple to make from a piece of fabric and a needle & thread. I used a sample of upholstery fabric, and cut it into a rough circle/oval shape. Do a line of running stitch just below the edge of the fabric - don't fasten the thread, just keep it loose as you will want to use both ends for tying the sack together. Gather up the stitches to form a sack shape. You might like to put a bit of stuffing inside, to make it look full. Tie the two ends of thread together in a bow to close the sack. Trim the ends of the thread if necessary.
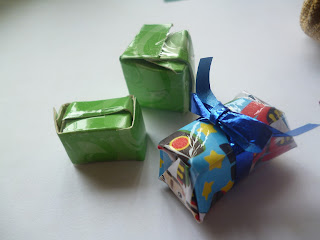
Then I created miniature presents. I just used an empty grocery box (I keep all my empty toothpaste boxes / cereal boxes / grocery boxes to re-use somehow). I cut up the box until I had a required size of card, and folded it up to create a box shape. I then wrapped them up and put a little bit of ribbon on them to decorate.
The North Pole sign is so simple to make. You need a piece of card, a marker pen, a skewer or toothpick, and tape. Write "North Pole" on one side of the card. Attach to a skewer or toothpick with tape. Pop into a piece of blu-tack or plasticine to hold it upright.I then created a sleigh.
You will need:
empty toothpaste box or something similar
card
glue
scissors/craft knife
pencil
1. Cut the base of the toothpaste box off, and trim to form the base of the sleigh.
2. Create a sleigh template, and copy x 2 onto card. If your card is one sided, or has a particular pattern on one side, make sure that you reverse the sleigh template for the second sleigh. Cut out. These are the sides of the sleigh.
3. Create a little seat in the sleigh by folding a piece of card to fit.
4. You might like to cover the inside, back and front of the box with paper. I placed my sleigh-box on to scrapbooking paper and traced around it, to get the right shape.
5. Glue the sides of the sleigh onto each side of the box. I outlined the sides of the sleigh using a gold outliner paint. You could use a silver or gold pen if you have one. I used bulldog clips to hold the sides to the box while it dried.
Santa's elves getting the sleigh ready.
The Christmas Elf scene in my dome.
Christmas angels, fairies and elves.
Paper stars in the background. I learnt how to make these 5 pointed paper stars here: http://lifeyourway.net/easy-1-cut-paper-stars/
Once I had it figured out, these paper stars were easy and quick to make. I tried making some using transparent paper, and I love the results. I hope to put fairy lights behind them so that they will glow.
Christmas trees were made from semi-circles of card, stuck with glue and sprinkled with glitter.


No comments:
Post a Comment